Showing posts with label Photography. Show all posts

Sunday, July 1, 2012

Some film snaps from this past week. I've been so full of inspiration that it has made me physically sick to my stomach at least twice already ... do you know the feeling? I think I'm in love with the summer, I hope our romance lasts. 

Friday, March 2, 2012

Hi it's Friday: Photography Edition

omg. it's Friday ... thank all goodness.

Today Im going to let the photos do the talking because Im feeling a little short winded. But I will preface them briefly. 

Yesterday we went to the park down by the lake. We have to jump over the gate indicating that the park is closed to get there ... but we do it anyway. For the first time at this park we saw two other children. Jude loves playing with other kids. They were with their dad who was on his cell phone pacing the length of the play structure. He occasionally would yell out to tell his kids not to do something. This lasted for about 10 minutes and then he called his kids to him and they left. Can we all just make a promise to each other right now to never be that guy? 

Not because he was busy, because i get it, people get busy. Let's just never hinder our kids from being unique and exploratory and inventive and having fun. Instead lets go to the park and have fun with them, let's give them the chance to remind us how it feels to be young and free. 


Friday, February 17, 2012

sunset

Have I told you about the magic that happens when the sun sets on the flat lands? The last rays of the day dance on the horizon. The sky is cast with deep orange hues and crimson light barrels into country homes. For a sweet moment everything is more meaningful, you are full with natures gift and think only of what surrounds you. 

Emily and I went on a photography adventure last Sunday night. These are my favorite photos from the shoot. Im not sure if I can use them for the project originally intended, so instead, I've decided to share them with you, and have composed a Haiku to accompany them. Every so often I am compelled to write a Haiku, it's a great way to express an overwhelming sensory emotion that you experience through nature.  
--

cold wind pinching cheeks
A red sun stretches her arms
Snow comes tomorrow


I must be feeling emotional, I can sense spring in the air, and I had a really great week. It's not very often when your family life, work life, and personal projects all live harmoniously together, and even benefit eachother ... but I really appreciate it when it does happen. 

Have a great weekend! 

Thursday, February 16, 2012

Jude, The Kid.

Well, It's official. We have a kid, not a baby, not a toddler, a full blown, four year old kid. It's certainly hard to believe that 4 years could pass so very quickly, but you know what they say about time ... they say all sorts of things about how it goes quickly and this and that. 
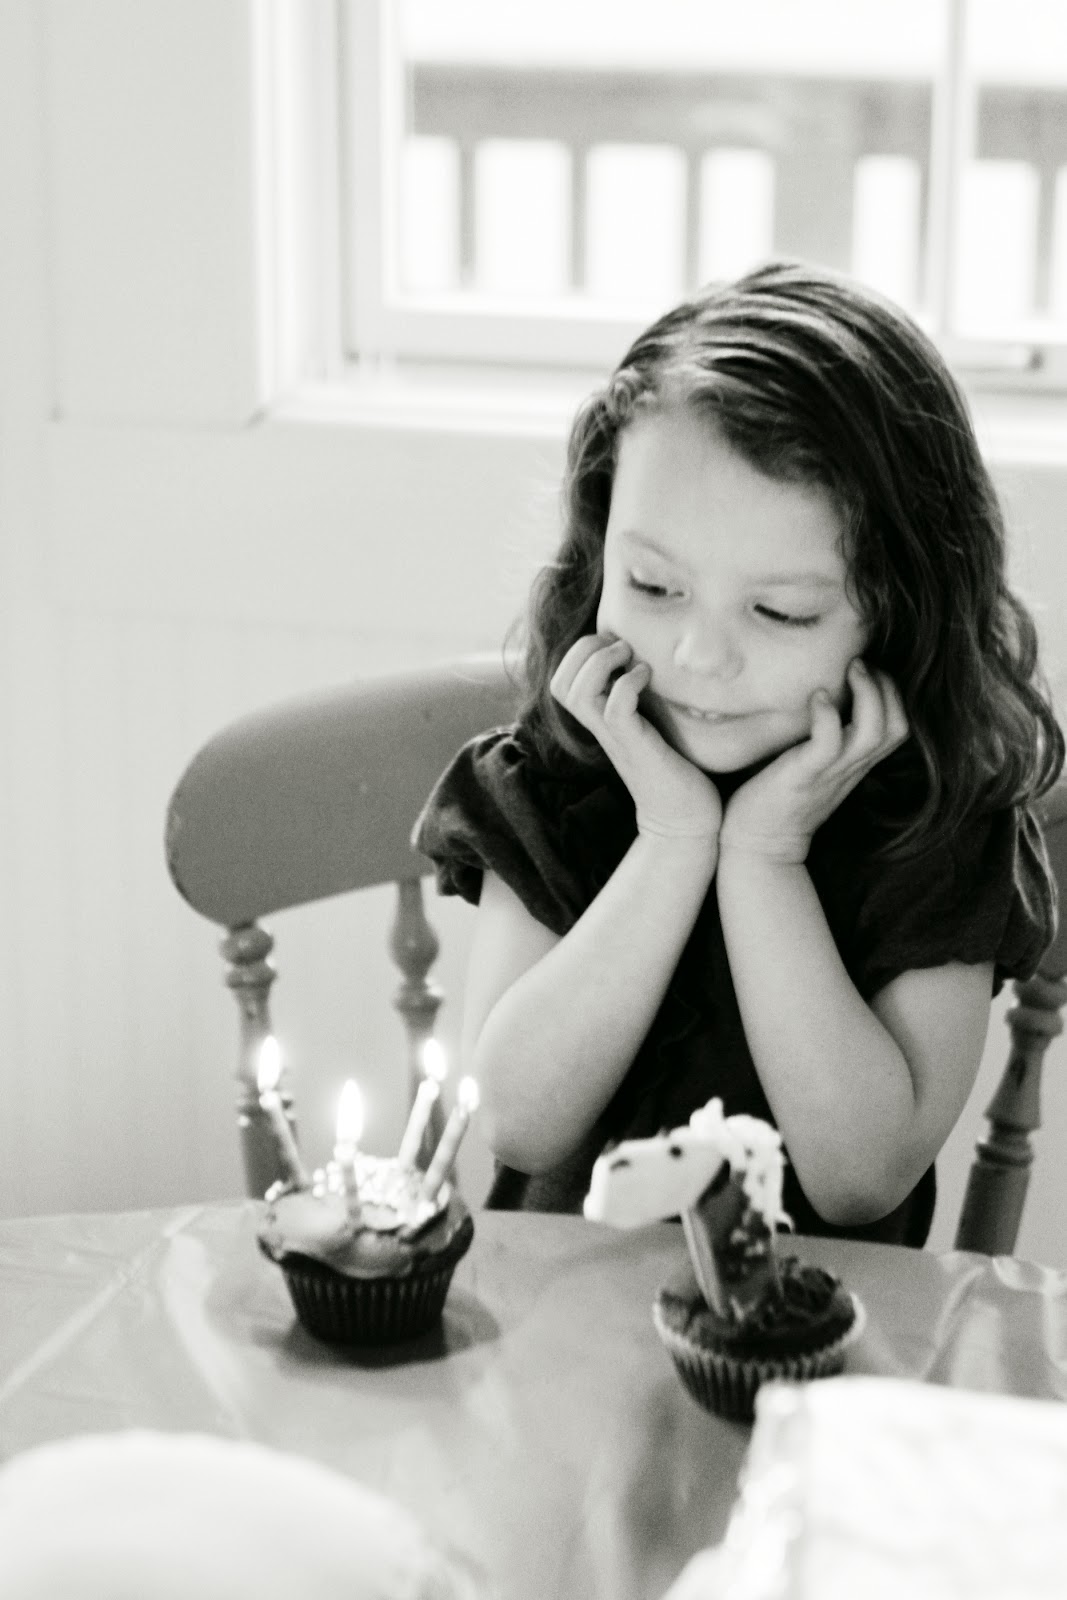
Today was one of those crazy days that included working, three meetings, hanging streamers, wrapping presents, making horse cupcakes, throwing a birthday party ... you know a regular day in the life of a mom. 

The horse cupcakes totally paid off though, right!? 
I owe Hello Cupcake for the idea and tutorial. Here's a quick run down on what they entail:

Head: circus peanut candy, dipped in white chocolate and chilled
Neck: two chocolate wafers pasted together with chocolate frosting
Body: chocolate cupcake frosted with chocolate frosting
White frosting was used for the hair, chocolate frosting was used for the eyes and nose. Sprinkles and drizzled white chocolate added to the neck and body. 

It was at the moment that Jude devoured the entire horse, head to cupcake, that I was truly satisfied with this endeavor. 
She's a natural birthday girl. 

Happy Birthday, Judith. You are the most incredible little girl. You made our lives, you absolutely made our lives.  


Monday, February 13, 2012

defying gravity


 I've been away for awhile on account of my sister being in town for a week. We've been road tripping, baking, watching obscene amounts of Deadwood, and (as you can see) defying gravity. 

You'll be hearing more from me this week, you lucky dogs you! 

Saturday, February 4, 2012

The Moo Moos

Who would have thought I would love cows so much. They are gental creatures. The girls are preggo right now, I can't wait until they have their babies. I told Brett I want to be a midwife for cows ... that's a profession right? This girl is posing for me, or waiting for me to get my camera out of her face so that she can eat in peace. 
Below are the boys, they are last seasons calves, they're smaller and more rambunctious. They are separated from the girls so that they can be fed more and eventually feed us.  
and here's the hubs. 

Thursday, February 2, 2012

smaze

I woke up at 3am and rolled over, I thought for a moment that our windows were fogged up. Then I realized that a thick, murky film of vapor had settled into the streets of Shelbyville. It was fog so heavy that I couldn't see the houses across the street. It lingered in the air all night and into the morning. At 9am, when the fog still hadn't lifted, I bundled Lennon up and we adventured out into the mysterious brume. I have to admit that I was a little uneasy, we took a road that I'd never been on and I felt like I was on another planet, we couldn't see 10 feet in front of us in some places. 

 "droplets of water vapor suspended in the air near the ground" 


Wednesday, February 1, 2012

My dear friend Heather, In the weeks before her wedding. Check out the full post on my photography blog. 


Thursday, January 26, 2012

Carrot Cake


Okay, so something I haven't told you is that I've been failing all week at making carrot cake ... I've never made a homemade carrot cake before and it took some trial and error to find the right recipe. But finally, after force feeding my family with variations of carrot cake all week long, we've found a recipe that we all love, yippee! The recipe is adapted from an all recipes post.


  • 2 cups white sugar
  • 3/4 cup vegetable oil
  • 3 eggs
  • 1 teaspoon vanilla extract
  • 3/4 cup buttermilk
  • 2 cups grated carrots
  • 1 (15 ounce) can crushed pineapple, drained
  • 2 cups all-purpose flour
  • 2 teaspoons baking soda
  • 2 teaspoons ground cinnamon
  • 1 1/2 teaspoons salt
  • 1 cup chopped walnuts (optional) 


  • Preheat oven to 350 degrees. Grease a 9x3 inch round baking pan. Set aside.
  1. In a large bowl, mix together sugar, oil, eggs, vanilla, and buttermilk. Stir in carrots, coconut, vanilla, and pineapple. In a separate bowl, combine flour, baking soda, cinnamon, and salt; gently stir into carrot mixture. Stir in chopped nuts. Spread batter into prepared pan.
  2. Bake for 55 minutes or until toothpick inserted into cake comes out clean. Remove from oven, and set aside to cool. 
  3. Once completely cooled, frost that bad boy! I recommend homemade cream cheese frosting, which is what I used, but any frosting will do. 

It's the power of buttermilk, I'm telling you ... don't underestimate the power of buttermilk. You can also throw in a cup of raisons and/or coconut flakes depending on your preference. I hope you try it and enjoy it! I was so pleasantly surprised when both my kids snarfed it down ... They usually stay away from cakes with healthy things like carrots in them, even if it is cake. 


Pin It

Monday, January 23, 2012

Winter Sprouts


After the holidays the urge to start planting sets in. Obviously January's gale force winds and freezing weather make gardening in the outdoor space pretty impossible. This year I decided to start a little indoor garden and mature some plants, some that I may be transplanting to the garden in the spring. I planted a traditional indoor greenhouse but I wanted to experiment with planting in egg shells. Starting seeds in eggshells provide your seedlings with nutrients that help strengthen them as they develop. It also saves you from spending money on little pots, and gives you the perfect natural casing to use when moving to a large pot or garden. Here's a quick how to.

What you need:

egg shells (start saving now!)
seeds (I got mine for $0.09 per packet)
seed starting soil (About $3.00 at any store with a garden center)

Fill your saved egg shells about half to three quarters of the way full with seed starter, then sow your seeds (2 or 3 seeds) cover and fill the remaining shell with soil. Read the seed pack for additional instructions depending on what you're planting. Keep your soil wet by using a spray bottle, and find a place to keep your garden where it will get sunshine and stay warm. When your seedlings sprout and start to grow you may need to thin them to prevent crowding. Soon you will be ready to transplant into a garden or into a pot. When this time comes, crush the bottom of the egg so that the roots of your new plant come into direct contact with the new soil.

My basil seeds sprouted within four days of planting them! I used my egg shells to plant our indoor herbs which we rely on throughout the year to supply us with fresh parsley, basil, rosemary, and cilantro. I'll be moving them to pots soon

So easy .. I hope you try it!


Tuesday, January 17, 2012

Self Actualizing


Brett's going to teach me how to feed the cows. I'm excited to learn and contribute in some way if i can, to the farm.

Living in the country has been a really big adjustment for me. When you live in chaos for long enough you feel an emptiness when the chaos is gone. I don't miss it, I hate it actually, but now I have to find a way to fill the void with something from within myself. It's a journey of getting to know myself and finding out what is important to me, and why it's important. I can't rely on being influenced by everything that is happening around me any more, I have to make it happen myself. I need to find the real reason behind why I do things, and stop expecting the world around me to offer superficial acceptance.

It's time to self actualize. 

Monday, January 9, 2012

Making a Splash: The How-To!


Im going to do a little tutorial on how to create a splash shot. When I first saw these splash shots trending on Flickr, I was so into it, I did a series of them a year or two ago and had so much fun! The thing about doing the splash shots is that they're not as hard as they look... it's really actually pretty simple. Here's what you'll need:

1. Digital SLR camera with a shutter burst setting. If you have an SLR, you should have a burst setting, some move faster than others. My current camera can shoot up to 7 frames per second, which makes doing a splash shot really easy, because it's all about capturing that perfect splashing moment.
2. Small Ball or Object. I've used bouncy balls, hard plastic balls, marbles, even candy. The size, weight and shape of the object that you use will effect the size and shape of your splash.
3. Cup ... or some vessel to hold your liquid
4. Coffee (cold coffee, don't scald yourself), milk, tea, some type of liquid ... I find that milk or coffee turn out best on camera
5. Daylight, and lots of it. You need to shoot this in a well lit room or even outside because your shutter speed will need to be really fast .. the faster your shutter, the less light your camera lets in, so the more available light, the better.
6. Towels. You're probably not going to get your best shot the first try, so bring a towel to your set because you'll be cleaning up you're mess a few times.

Today's objects:

So now that you have what you need you can begin to set up. A splash shot can have a fairly simple set because the splash will be the real subject anyway, but I always like to stage things up a little. Just remember whatever is in your set, will probably get splashed. I usually lay my camera flat on the surface that Im shooting on, sometimes I'll lay it on a book for a little more height, you can always use a tripod too, somehow I find that Im usually too lazy to bring mine out. You'll want to position your camera far enough back so that you can capture a fair amount of space about the cup, depending on how tall your splash gets. Once your set is up and your camera is in place focus your camera on the outer rim of the cup. You'll want to refocus between every splash you make. 

Now adjust your camera settings. Your shutter speed should not be any slower than 1/800 of a second. 

My settings in these shots were 
Shutter: 1/800
Aperture: 2.8
ISO: 1250

Beware that an ISO this high can give you a really noisy (grainy) looking shot, depending on the camera you are using. If you are using a Canon Rebel or the Nikon equivalent I would NOT recommend using an ISO higher than the 600-800 area. 

Also keep in mind that an aperture of 2.8 has a shallow depth of field, if you are going to use an aperture this wide open, pay careful attention that your focus is just right. 

You can throw/drop your object and hold down the shutter at the same time, that's usually how I do it, however if there's an assistant available (husband, child, house guest, etc.) certainly use them! Hold down your shutter and then drop your ball, wait until the splash is complete before lifting your finger from the shutter. Now check out what you have captured! It usually takes about 5 splashes to feel satisfied with what you have, and you'll probably have several of these: 
Here is a snap of my favorite assistant at work, drying some spilled coffee from our set. It's really important to clean you set thoroughly between shots, because the last thing you want is a perfect splash but coffee stains all over the front of your pretty cup from your last splash. 
I will leave you with one last capture from today's splash session. I hope you have fun trying this one out... I have a feeling you will! If you have questions, please ask, and if you do try it, please share! 


Pin It