Showing posts with label Our House. Show all posts

Monday, April 16, 2012

Dining Room

I'm going to be working toward giving you a tour of each room in our home, and then hopefully have a central place to view it all. I have big plans for this dining room, but we haven't really started progress yet. I love this room, it's a pass through between the kitchen and living room, and has access to the back stairwell. I actually think this may be my favorite room in the house. There are so many historical elements in the dining room that really make it special. 

One thing that we have done since we moved in was paint the back stairwell white and remove the door. This makes the room feel larger and makes the back stairs way more usable. I still plan to paint the risers in a stencil pattern. 
My favorite thing about the room is the butler's pantry. It accesses the pantry in the kitchen, so back in the 1880s the kitchen help could set food on the ledge, knock on the door, and then close the pass through so that no one would ever see them. This is the sort of thing that intrigues me to no end. We keep the door open now and use it as extra display space and as a buffet when we entertain
The china hutch was an estate sale find that my mother in law had in her garage. She was nice enough to give it to Brett and I when we first moved in. It's beautiful cherry wood and does a fine job of housing our china (also an estate sale find, thanks to Brett's mom!).
Our record player has found a permanent home in the dining room. We can hear it in the kitchen, the living room, and even up stairs. We all spend time in this room whether we're crafting, painting, play-doh(ing), or eating. It's a place we all enjoy. 


Thanks for stopping by, I hope everyone has grand plans for a fine week!

I'm linking up to Thrifty Decor Chick's Dining Room Party
Check out all the wonderful dining rooms!

Thrifty Decor Chick

Tuesday, April 3, 2012

Laundry Room Reveal

The long awaited laundry room reveal is finally here! After about a month of having everything that belongs in our laundry room, in our 4ft. wide hallway, I am thanking the heavens that the room is actually in functioning order again. There are still a couple of things that we want to do, but it's good enough for some reveal action! 

Here's the before ... so gross, right!?

and the after:


Let's break it down:  

Planked walls and hooks 
We installed a floor to ceiling (10x10) wall of barn planks that we reclaimed ourselves. Found, cleaned, removed nails, animal poop, etc. We were able to locate three studs in this wall and mounted each board to all three studs. 

I actually persuaded Brett to make a trip to Hobby Lobby one afternoon where we found these hooks. They match the knobs we used for the cabinet and I love them. 

Folding Bar
The hooks are hung above the folding bar that we installed. Below the bar are our laundry baskets. The main reason I wanted the planked wall was for support, making it possible to actually install a laundry bar and hooks. Without the planks, the crumbling plaster would have had us in a lot of pain. 


The folding bar and shelf above the washer and dryer are made from cedar boards that we purchased form Lowes. We actually took out every single cedar board in the store and chose carefully which to use for the project (yes, while our kids were in the cart screaming at us, they put up with a lot!). We had them cut to size at Lowes and then took them home where they lived in our bedroom for a week, on saw horses, while Brett polyurethane-d them to absolute perfection. 


Tile Backsplash
I know you've heard about the backsplash project a few times. Like when I was so excited that we found the tile, and then when I was crying because it was so hard to install, and now I'm just bragging because it's so dang awesome. 


The Cabinet
We gave new life to the existing cabinet. We removed it from the wall, took it apart, painted it inside and out, rehung and centered it, and added new hardware. This paint project took us at least 2 weeks to complete. 


The Details
Every room in your house should have a few things that you love in it ... even your laundry room. 


We managed this project on a way way way tight budget:

Reclaimed boards and installation: free of cost, not free of work! 
Hooks and knobs: $10.00 half off at hobby lobby
Cedar boards and poly: $35.00
Paint: $17.00
Tile: $13.00 for 10 sq ft. 
Mastic, Grout, and supplies: $40.00

Total Cost: $115.00

Everything else in the room are things that we already had, except that tiny washboard, which I picked up last Friday at goodwill for $1.00, so okay, $116.00 total. 

So what do you think? Have I convinced you to make over your laundry room, or install a planked wall in your home, or do you think I'm crazy for even spending $100 in a tiny laundry room? 

Tuesday, March 20, 2012

Spring Mantel 2012

Today is the first day of spring, rejoice! I decided to be a grown up and decorate for the season. The Lettered Cottage is hosting a mantel party so I jumped on the band wagon and dressed my mantel. 

Ever since we've moved into this house I've struggled with decorating this mantel for a few different reasons. First of all it's like totally gothic, Halloween worked, spring was more of a challenge. Secondly, it curves in and out and the narrow parts are actually pretty narrow. Thirdly I placed my favorite mirror above this mantel, which is most certainly it's rightful place, and I refuse to take it down and replace it with something more seasonal. Despite my challenges, my daunting challenges ;) , I am pleased with how the mantel turned out.


I pulled in my wild flower seedlings from the next room and tucked in a couple of seed packets that I haven't planted yet. 
I used my usual books in a different orientation and pulled some San Pelle bottles out of the pantry to use in the spring display. 
Brett got me these pretty antiqued birds for Christmas and I think they are the perfect addition to a spring inspired mantel. 

A yellow painted shutter serves as a backdrop. We have several of these old shutters in our attic that were here when we moved in, and I just so happend to have a can of yellow spray paint in the garage         (it pays to be a hoarder). 
 The purple branches I brought in from outside. I know it seems cruel to trim back a blooming tree, but the tree is awkwardly placed and Brett has never liked it. I keep it trimmed back, to save it's life! 

Mantel mania. How's your mantel looking? 

---------

The Lettered Cottage

Wednesday, March 7, 2012

Cleaning Vintage Hardware

There's nothing in the world that I love more (okay may be there's a few things) than fresh, unpainted, vintage hardware. Ever since we moved into this house I've become hyper alert to all hardware everywhere ... It's a bizarre obsession, and almost everyone has a hinge or two in their house that has a bit of paint on it. I'm pretty determined to be one of the few that doesn't. 

During the week I need laborious projects to keep my mind busy. Monday I decided to take down a couple of doors that were hindering the functionality of this house. When the doors down I carefully removed each piece of hardware, including the hinges on the frame. I now plan to place the newly cleaned hardware on existing doors and remove the painted hardware and work my way through the house. 

I now have a burning desire to strip the paint from the doors I removed ... all sources say this is crazy, which is probably why I'm going to do it. 

I will give you a quick run down on what I did to clean the hardware. I visited This Old House online (my lifeline) and discovered that in order to remove paint from hardware you don't need to use harsh chemicals , which is awesome because we have kids in the house, the environment doesn't prefer harsh chemicals, and mostly because I'm cheap and didn't want to go buy something to do the job. 

One of the best ways to remove paint is by applying heat. I soaked these knobs and hinges in an old crockpot (that I had purchased from Goodwill in a hoarding moment) with water and a little bit of dish soap for about 24 hours. The paint literally peals right off, it was amazing, I did use a nylon brush to clean paint and grime out of the crevasses, don't use steal bristles, as it will score your vintage iron. Finally you can shine them up a bit with some beeswax oil, I used furniture oil which you can get a your local hardware store for about $5.  

Im pretty stoked on this project, even though it's incredibly dirty work, I feel like our beautiful old house is thanking me. Also I was majorly excited when I realized I had the perfect materials to take a "things neatly organized"photo. It's the little things in life, like staring at things neatly organized, it just makes sense. 

Before and After (may be some process) photos to come ... Sometimes I get too excited to take a before shot, working on that. 

Tuesday, February 28, 2012

Laundry Room Sneak Peak

Remember how I told you we were going to start working on our laundry room? Well my friends, things are starting to come together. I dream of having this fabulous farmhouse laundry room where everything is clean, organized, and the laundry is always done. That's possible right? Have you ever seen the photos in washer and dryer ads, you can totally tell no one has ever done laundry in one of those laundry rooms... I mean come on, changing the lint trap alone causes a toxic dust cloud, the washer is always caked in detergent, and there's usually a collection of homeless items piling up on top of the dryer. It can be nasty, which is precisely why we want to give ours a facelift and make it a little easier to work in and clean. 

I had the idea of putting a backsplash on the wall behind the washer and dryer. We have about 10 sq ft there and I thought it would be an affordable way to make a big impact.  
So, with that in mind, Brett and the kids and I journeyed to Home Depot were we found glass tiles averaging in the $10 per sq ft range ... that's not too bad if you're looking at only 10 square feet, but I wouldn't call it a bargain. We decided to wait on the idea and the next day while in Decatur we stopped into Lowes and found these beauties (see below) on clearance for $1.20 per sq ft! That means that we only spent about $13 total for what we needed. I was so excited, I nearly danced in the store... may be a did dance, just a little.  


We're going to tile the back wall where the washer and dryer back up with these tiles. One side wall will be planked with barn wood, which will enable us to hang as many hooks as we want and a folding bar. The wall is 10+ feet long and 10 feet high, so we spent all of Sunday afternoon looking for barnwood, pulling out nails, cleaning, and cutting. We had to bring home 20, 10ft boards for the job ... we can practically build a house with what we have. This may be the most exhausting effort I've ever put into a home improvement project! I was sore and aching all day yesterday, THIS is pretty much exactly what I looked like all day. 


Hopefully I will have a finished product to show you soon! Can you imagine how handy we will be after this project? 

Wednesday, February 22, 2012

The Cellar


When we were looking at buying this 130 year old house, the inspection revealed that there were some serious structural issues with the fondation, or I should say, there would be if we didn't take steps to prevent them now. One of the less glamorous things about owning a home is doing the work to make sure your home is structurally sound. The up side to this is that you can go to sleep at night feeling good about knowing that your house will still be standing when you wake up the next morning. 

Today Brett (with the help of his fearless mother and of course my moral support) cleaned the bricks at the foundation of the house, in the basement. Now that they're clean, they can be mortared and secured, so that the house may stand for another 100 years. 

The thing about basements in old homes is that most of them are usually just crawl space. Crawl space consists of dirt, cobwebs, and probably like a thousand spiders. I'm taking baby steps towards toughing up and becoming a country girl. Working in a crawl space would be like a monster step, which is why I decided to offer the cheerleading skills from my high school days along side my documentary expertise. 


 Above is Elaine (my courageous mother in law) spraying off ancient spider guts and cobwebs from the 19th century (most likely anyway). 

The above photos are in the basement crawlspace that is under the front of the house, but there are actually two rooms in our basement towards the back of the house. They are equally as scary and filled with spiders, but could actually be used. 

I desperately need to get down there to clean and organize, but have been using the cold weather as an excuse not to do these sort of things. There's some old iron work from the house that I want to use in my garden and need to clean up a little, so I'll get to it during planting season I suspect.  

If we actually were able to get this space cleaned up, it would be a perfect dark room, theres running water and everything down there. Can you imagine working in this basement in the pitch darkness, gives me shivers just thinking about it! I think I'll have to spend some quality time under the house getting to know the ghosts and resident spiders before getting carried away with building a dark room :)


Tuesday, February 21, 2012

The Truth About Sinks

Do any of you have an itty bitty pedestal sink in your house? I think they are so delicate and pretty. I never actually had a pedestal sink until moving into this house in September, where the previous owners installed two in the two rather small downstairs bathrooms. 

In theory, a pedestal sink is a dream, it's small, doesn't take up space, it's pretty, has an old world look. It's just the perfect sink, right ... wrong. Well, in my experience, pedestal sinks are just not functional. Sinks are meant to be used, wash your dirty hands (may be even your kids' feet), pot plants, clean paint brushes, give your dog a bath, soak your delicates, clean your shoes. 

I dream of a big, huge laundry sink made of exquisite porcelain. My favorites are ones that have the counter top sides, like the one in the third image. My second favorite is the one in the sixth image with the dual compartment, which I think would serve the same purpose as the shelf ... may be even be more functional in some cases, and it's smaller so it might actually fit in our little mudroom bathroom. Anyway, enough of my sink talk, I just wanted to share my thoughts on sinks and a few examples that are just beautiful. 


Function should not be compromised for beauty, and beauty should not be compromised for function. 

The end. 

Wednesday, February 15, 2012

To Paper or Not to Paper?

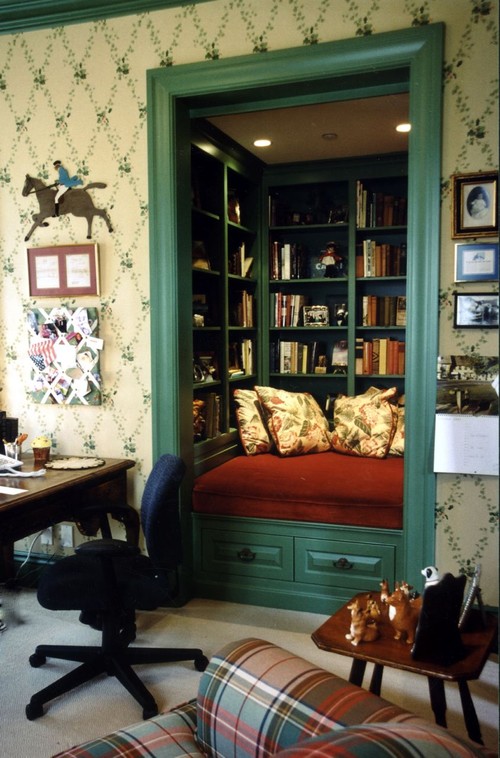
This is the question that I need help with ... what do you think? Here are some inspiring paperings that have me swooning and convinced that I will love it forever. When I remember my fickle and spontaneous nature, I cringe at the thought of actually removing the wallpaper at some point. This is today's first world problem ... HELP!

Listed from favorite to least favorite. I want something that will feel country and reminisce of a time passed. I can TOTALLY work with a granny look, or the look of the wild wild west. Im thinking of it for the dining room, or possibly the parlor, it would be a full room paper job, not a one wall deal. What's the saying? "If you're gonna get wet, you may as well swim"? 


Book Nook traditional family room
via: Houzz

So what will it be paper or no paper? 

Wednesday, February 8, 2012

The Guest Room

 My sister is visiting this week, yay! I love having guests, especially when it's my sister. I have been looking forward to having her, but knew I had to get the guest room whipped into shape before her arrival.

For the first month we lived here we had nothing in the guest room, nothing. I didn't think we would ever be able to fill it. The room originally had wall to wall carpeting that we ripped up right away. We found a painted red floor underneath the old carpet. Brett and I decided we liked the red paint, but it had been destroyed with staple holes and was covered in paint drops from a careless painter. We bought a gallen of red floor paint and brought the floors back to their former glory. 

Everything else in the room, including the green walls and the wrap around shelving, we left in place. We like the idea of the shelving, but don't like the cheap white stuff in place. We plan to (at some point)  replace the boards with actual wood and replace the brackets with something wrought iron, vintage, pretty ... you know.

Here's a before and after (the before with our Lennon pictured). I'll take you through the way I filled the room, when I originally thought I had nothing.

Before  |  After

The first (and most important thing) we put in the room was the bed. The bed frame was Brett's grandmother's. Brett's mother gave the bed to us along with an extra double mattress that she had. We really lucked out on this one! I used a queen flat sheet to wrap the box spring instead of using a bedskirt, which I thought would show off the bed a bit better. I also made the bed like my grandmother always did, wrapping the pillows with the coverlet ... i love the granny style look it gives to the bed. 


I had the suitcases in the room originally. I've been collecting old suitcases for a few years and thought that they would be fitting in a guest room. There's an extra chair that we had in the house with a throw pillow that wasn't being used. 

In our last house we used these IKEA shelves and brackets in the kids' rooms that we had painted. We weren't using them here so I took three of them, painted them brown and hung two to act as side tables and one across from the bed to act as extra storage space/vanity area. 

On the high shelving I used old bottles that we had saved to decorate the space without making it feel cluttered. 


On the other bed side shelf I used an old window that is filled with sun prints I made last summer. The window hadn't found a home in the house yet, so it works perfect here. 


You may remember the lamps from the spray paint post. An alarm clock and a living plant add to the sweetness of the space. I hung a little art piece that I painted myself on a scrap of barn wood. 


We found this chair in the basement of the house when we first moved in. I painted it and it's as good as new. The mirror is from the bathroom that we redesigned. 


I love the red floors! 


Above the vanity  is a vintage fan and make up box. 


This room doesn't have a closet. I like the idea of offering guests a place to hang their things. 


Extra blankets and pillows are functional and fill the space. 


I hope you like the guest room! One day may be will do a little more to it, but for now it's a cozy place for a guest. Will you come stay with us? 

Friday, February 3, 2012

Sneak Peak #3 - The Mudroom

We are closing in on the very final stages of the mudroom redesign, Im so happy to be using it again like normal. I have a few more finishing touches to put on and then I will present the great reveal! For now I will show you one of the projects that I have been working on that gives the room a slightly more personal feel. A homemade sign featuring our last name, made from reclaimed barn wood, and painted by yours truly. This sign was incredibly nerve wracking to paint because the sign was already hung when I started, and I just knew I couldn't mess it up! It's not perfect but it's hand painted by an amateur, so I am satisfied.  


Im going to give it a second coat tonight and fix a few spots that Im not totally happy with (I think I need to beef up my r), but other than that is done! 

So how did I do it you ask? I decided before hand on a font that I wanted to use (something that I had made up in my head) I then searched many fonts until I found one that was similar enough to what I had envisioned. I then printed out the name and sketched it on the sign with pencil, trying to match the printed version as closely as possible. I also had a very large eraser. The floor was covered in eraser shavings. You can't tell very well from the photos but our ceilings are 11 feet high, and this sign was hung at about 9 feet, so I was doing this all while perched atop a very tall ladder, one that Im not looking forward to climbing again for the final coat. 

Here's a photo with a bit more context, but ignore the light because I desperately want to replace it. I mean it's not a bad light, but I really want something more our style. 

All we have left to do is install new light fixtures and I had my heart set on building a bench ... and now I have been thinking of building another shelf (my husband doesn't know about this yet, so shhhh). 

TGIF, my friends, happy weekending! 

Pin It