
Allow me to give you a few pointers before you embark on your own tile project. While my finger nails are still coated in a thin layer of grout, I have recognized it's urgency.
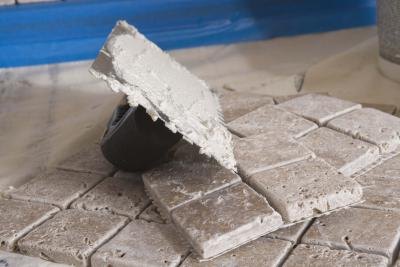
1. Consider your adhesive.
There are two main tile adhesives to choose from, Mastic and Thin set. Mastic is good for small jobs in a space that is not exposed to water. Mastic has a stronger initial bond and makes the process of laying your tile easier, however it is a natural compound and will break down in the presence of water. If you are doing tile anywhere in your bathroom, mastic is not a good choice, but if you are doing a laundry room backsplash or even something in your kitchen, mastic may be the product that you are looking for. Thin set is the traditional product that is used to lay tile. You must mix this product and it can be tricky for a beginner to achieve the right consistency, but if you are doing a large tile job or tiling anywhere that water is present, it's the product you want.
2. Think about how the tile will fit in your space.
Always buy a little extra tile. Even if you measure you space at exactly 20 sq ft. There may be a few places where you will have to cut tile in a strange manner, making the other half of that tile unusable.
3. Consider the tile material.
If you are using glass tile keep in mind that they can be very hard to cut, where as ceramic tiles snap right in half after scoring them lightly with a blade. There are several different types of tile cutting tools, however you may want to research them before making a tile purchase, so you have an idea of the cost of buying or renting your tile cutter.
4. Take design into consideration.
If you buy tile that has several different colors involved you will spend half of your time making sure the color pattern works while cutting and laying. This process is very tedious.
5. Realize that laying your first tile will be a learning experience.
Getting the right amount of mastic or thin set laid is the hardest part of actually adhering the tile to the wall or floor. This process might take some research and/or trial and error.
6. Measure twice, cut once.
Really though, measure twice, cut once.
7. Grouting is the easy part.
Although grout is messy and sticky applying it is easy and goes quickly. Remember not to grout your tile until the adhesive has fully dried. Grouting will take you a fraction of the time that laying your tile did. You'll definitely want a sink near by during this part.
8. Tiling isn't easy.
Too many resources lead you to believe that tiling is a totally easy DIY project, untrue. It's probably something that gets easier the more times you do it, but the first go is rough, and takes time. With that said, tiling is a completely achievable task, and if you want to do it yourself I encourage you to!
So those are my tiling lessons. Even though our tile laying experience was rigorous, exhausting, and required many moments of problem solving, our space turned out really awesome! I cant wait until everything is finished. The grout is still drying and we will have to caulk the seems. After that's done, no more heavy lifting involved, just finishing touches. Stay tuned!
The worst iphone photo in the history of the world:

No comments:
Post a Comment